As your staff and amount of work grows, the amount of tasks may become difficult to manage, especially when one task will depend on another.
In order to deal with task dependencies and manage your teamwork better, you can organize typical tasks into "projects". A project is composed of 2 or more tasks. It’s a preprogrammed set of instructions that tells staff how to work in a sequential order. Projects help reproduce the same sequence of steps over and over again for various customers. These steps reflect your business practice, i.e. who and how is involved with this activity. Projects are based on project templates that define the behavior of the project.
To create a new project based on an existing template select “Workflow”> “Create project” or simply press Ctrl+F6. First you must choose a project template from the list of enabled projects, a client, assign a project owner, determine a deadline. If the project is recurrent you can set owners for projects that will reoccur. Also for recurrent projects you can select if you want to copy project instructions from previous projects or from original project template. You can fill “Project Instructions” and “Task Instructions” fields, however they will be populated by default project and task instructions defined in your workflow template. You can also attach files to the project (i.e. input files from the client, such as expense reports, stubs, bank statements, etc.). Below is an example of the project:
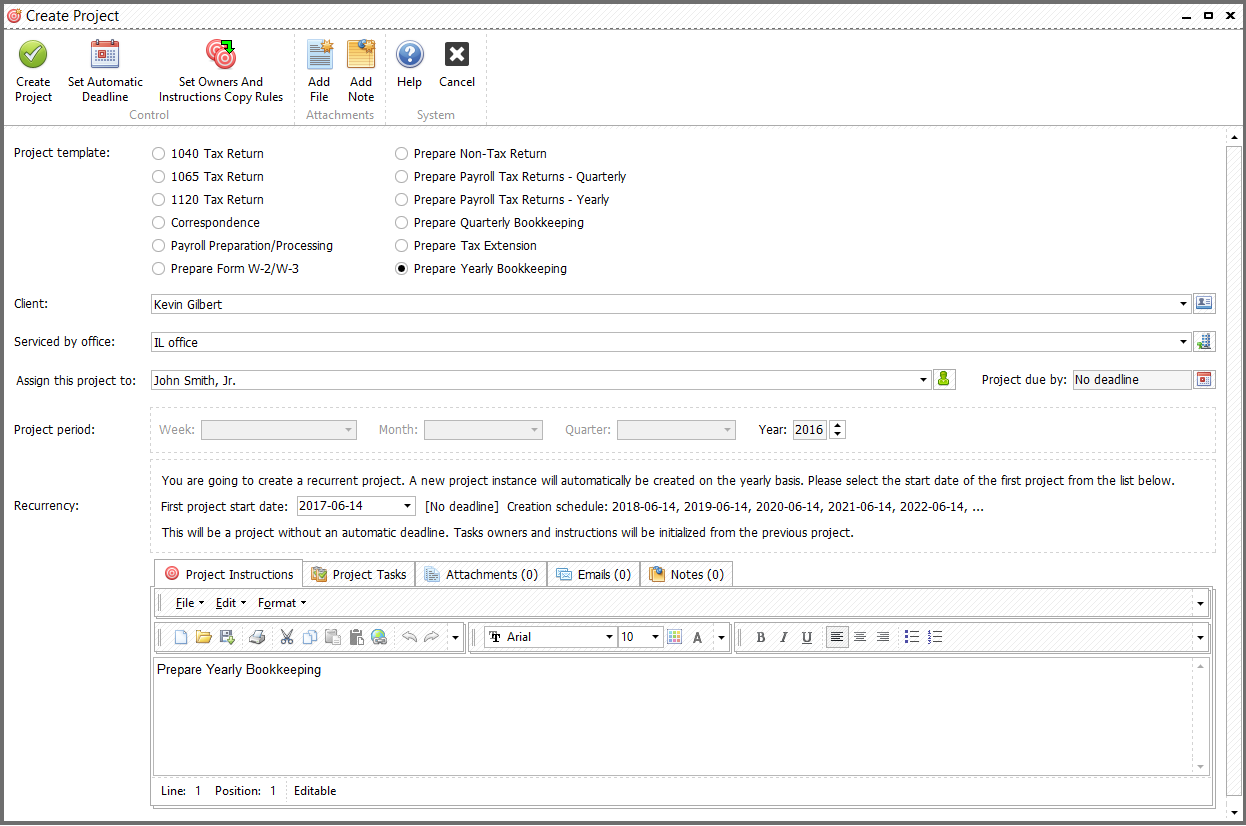
Tip: "If you can't find necessary project template please check its status at "View Project Templates" window. Project template must be enabled to appear in the list of available project templates."
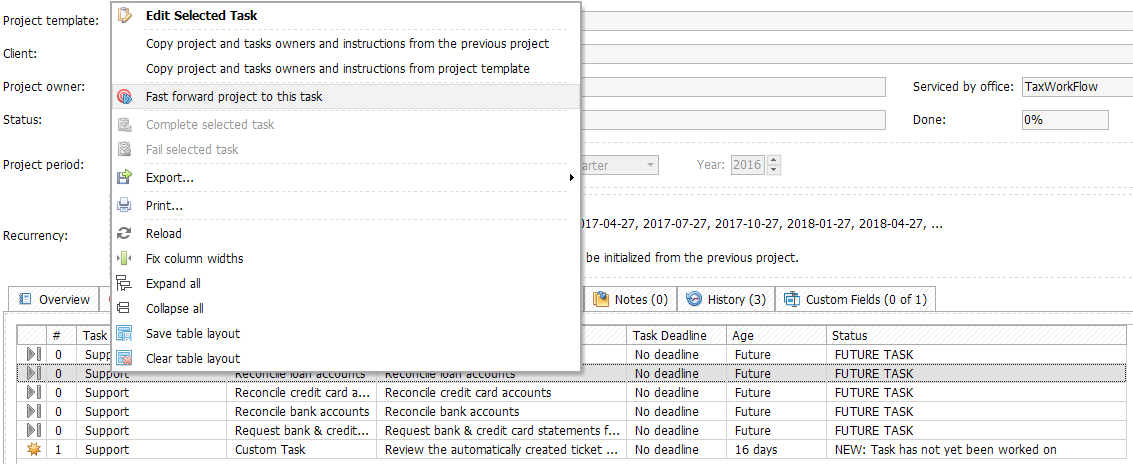
Here is an example of tasks of previously created project:

In this example, each scheduled task of the new project has its own order number. You move over to the next task in the queue after you complete the current task. That is called "upgrading the project", i.e. advancing the project up the schedule pipeline of tasks until the project concludes. You can upgrade project, for example, from “prepare” to “review” status, and the prepare task will be closed automatically. Downgrading the project means the step back, e.g. from “review” stage back to “prepare” stage.
To select a client or office you can use a drop-down list or special forms. They are available by clicking the appropriate buttons to the right of the fields.
"Select client form" allows you to select multiple clients to create several identical projects at once for selected clients. Find out more information about "Select client form" "Select client form" chapter. "Select office form" is described in the relevant topic.
Tip: "Office selected on this step can be changed in future when project is already created but you can not reassign project to another client upon it's created"
Another useful feature is the "fast-forwarding" of a project. It means you can move the project state over to any task of the project (not necessary to the next one or previous one). After the fast-forward procedure all tasks in the queue before the chosen task will be skipped if you choose the future task. If you choose some previously completed task all task completed after it will be reset to initial state and scheduled for future completion. You can fast forward a project by selecting the task from the queue and clicking on the right mouse button and selecting "Fast forward project to this task":
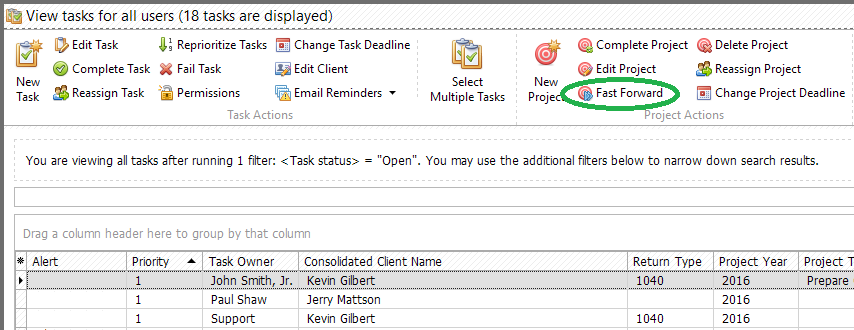
You can also fast forward project from the "View tasks" window. Select the task of the project that you want to fast forward and press the fast forward button:
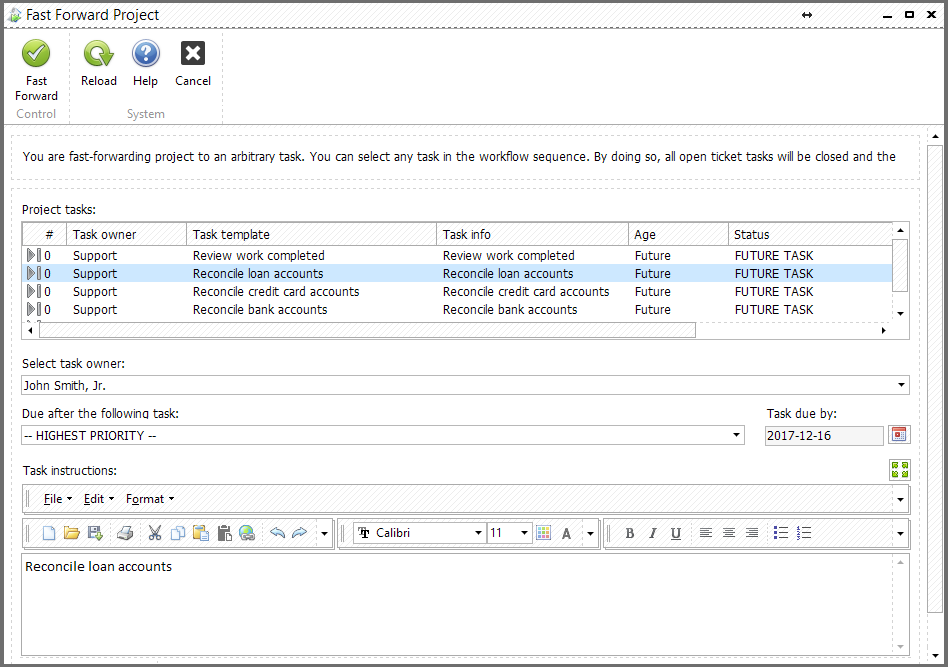
In the new window you can select a task to which you want to fast forward project, as well as make other changes in the project, i.e. change the owner, priority or instructions.
Each task of the project and a whole project itself can be assigned or re-assigned to any user of the system. Future tasks can be supplemented with special instructions and assigned to different staff on the individual basis. This gives you the power of the "fire and forget" concept that allows you to schedule the work in advance and then have it done according to your plan.
Some projects need to be repeated on a specific time basis. In this occasion you must create a project with recurrence. Recurrent project will be automatically re-created by the system on a time basis you define. For example, the project can be re-created each year if you make this project template recurrent. Pay attention to "Recurrency" block below:

Here you need to select a first project start date, it'll be automatically created that day and than it will be automatically re-created each year, the application will show you the creation schedule.
You can also set an automatic deadline to the project. Click "Set Automatic Deadline" button on the top of the "Edit project" window:
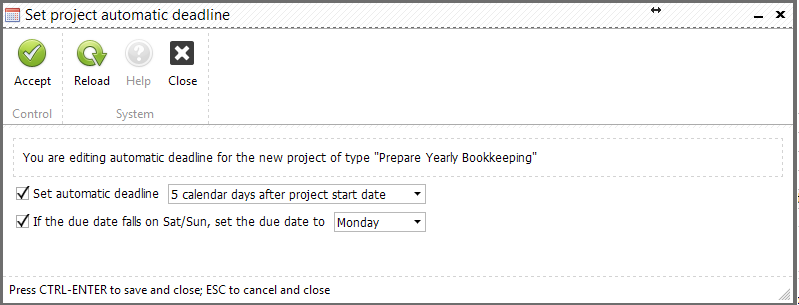
You can link the deadline to project period end, project start date or select a custom month and day. Also you can set the deadline to be moved to any day of the week if the due date fails on Saturday or Sunday.
Later you can change the deadline of particular project by clicking "Change Project Deadline" button.
Also you can select from where to initialize task owners and instructions for new projects by clicking "Set Owners and Instructions Copy Rules" button:

For example, if you select "The previous project" the new project will keep all changes you performed during the completion of the previous project while with selected "The project template" the new project will appear with default task instructions and owners.
Tip: "Keep owners and instructions from the previous project can be useful if you have multiple clients and there are some specific instructions for several of them. With this option you don't need to duplicate project templates for each specific client separately."
To stop recurrent project you need simply to click an appropriate button that appears after the project is created:
