TaxWorkFlow allows users to compose PDF files from any images including those captured from scanner. Built-in OCR and image quality tools are able to make your PDF files text searchable and keep the best quality of images along with a high compression level.
To create a new PDF file you need to go to "Clients" > "Documents" and click "Create PDF Document" button. This button is also available from the Dashboard.
First you need to setup document properties. This will save your time as all images you add to the document will be processed according to these properties straight upon you add them. You can change properties later if you need.
Tip: "Set document properties before you add images to the document. You can change properties anytime later but this will require additional time to re-compress and re-OCR all the images of the document. If you have a doubt about settings, add one image and play around with the document properties. When you're satisfied with the quality and size of the image go ahead and add other images to the document."
Properties block contains the following sections:
1.Document Information
2.OCR & Image Quality
3.Permissions And Security
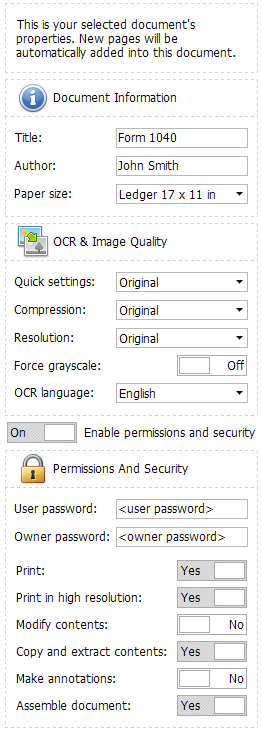
1. In "Document Information" section you can edit document title, author and paper size.
2. "OCR And Image Quality" section contains the following settings:
1) "Quick Settings" - allows you to apply presets from the list below:
•Original - keeps original compression and resolution. OCR is turned on.
•Color Document - sets compression to JPEG 50% and resolution to 150 dpi. OCR is turned on.
•B/W Document - sets compression to JBIG2 (lossless) that allows you to significantly decrease the file size, keeps original resolution and forces grayscale to ON. OCR is turned on.
•Picture - sets compression to JPEG 50% and resolution to 150 dpi. Turns off OCR.
•Screenshot - sets compression to PNG and keeps original resolution. Turns off OCR.
•Web Image - sets compression to JPEG 25% and resolution to 72 dpi. Turns off OCR.
•Custom - allows you to select your own settings that are not included in the presets list.
Please note, all presets were designed to maximize the quality of images and minimize their size.
2) "Compression" - allows you to select a compression from the list below:
•Original
•PNG
•JPEG 100%
•JPEG 75%
•JPEG 50%
•JPEG 25%
•JBIG2 (lossless)
3) "Resolution" - allows you to select one of the following resolutions:
•High (300 dpi)
•Print (150 dpi)
•Screen (96 dpi)
•Web (72 dpi)
4) "Force grayscale"
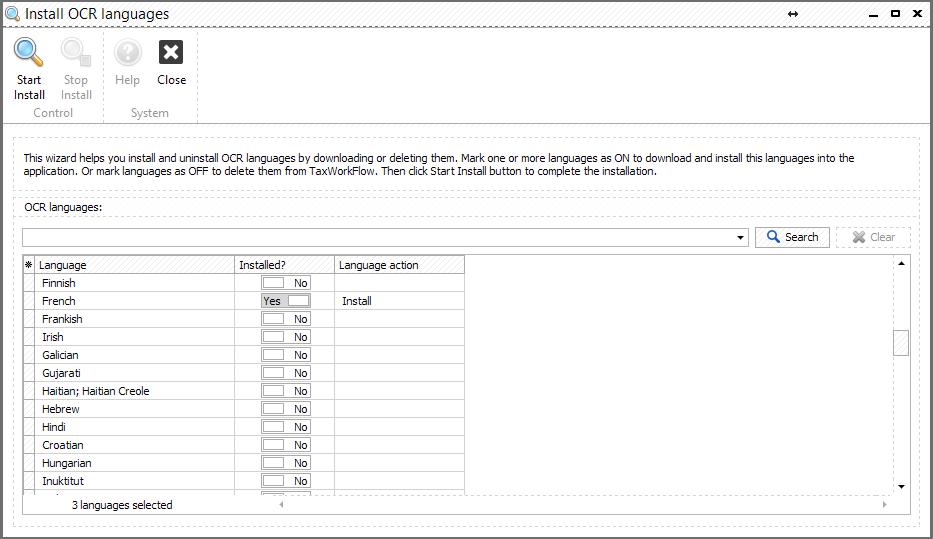
5) OCR language - allows you to select OCR language or turn OCR off by selecting "No OCR". To add languages to the list you need to open "File" > "Install OCR languages...", select languages that you need to install by marking them as ON and click "Start Install" button.To delete languages from the list you need to mark them as OFF in the list:
When you're ready with document settings you need to compose a document. There are several ways to add images to a document:
1.Click "Add From <your scanner name>" button to scan an image and put it into the document
2.Select you smart phone or digital camera in the list of scanners to add images from it
3."Add From File" button allows you to add images from your disk or network places
4.Drag-and-drop files from your file system onto the document (left pane on the screen)
5.Copy the image and paste it into the document

To add images from your smartphone you need to select it in the list of scanners. The tree view of all images will appear. You can change it to list view which is helpful if you need to sort files by timestamp independently of the folder they are stored in:
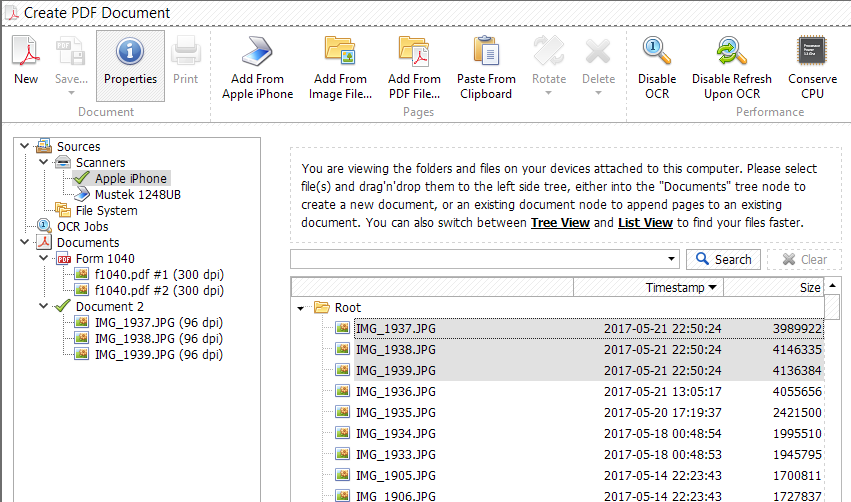
You can also use "Search" bar to find images by name. Composing the document from images from your smartphone/camera you can drag and drop them to the left pane, you can select multiple images and put them in any place of the document.
Each image of the document can be rotated by 90, 180 and 270 degrees. Also you can drag and drop pages from one document to another, or even drag and drop the whole document to any place of another document.
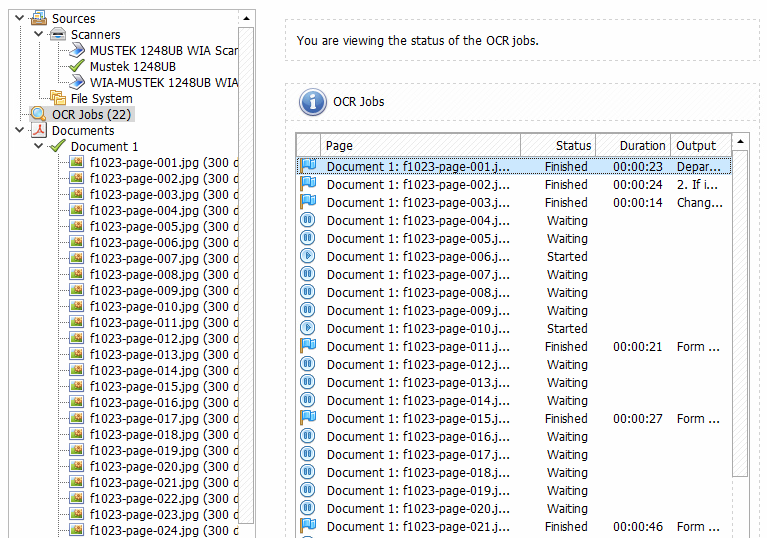
Besides the documents and their pages the left pane contains a list of sources and an information about OCR jobs. When you add a bunch of pictures to the document and OCR process starts you can see what documents are already OCR-ed and what documents are still in process:
If you need to check the OCR results you need to click right mouse button on the page you'd like to check and select "Show output text...". A new window with OCR-ed text will be opened. Below is an example of this window and OCR output:
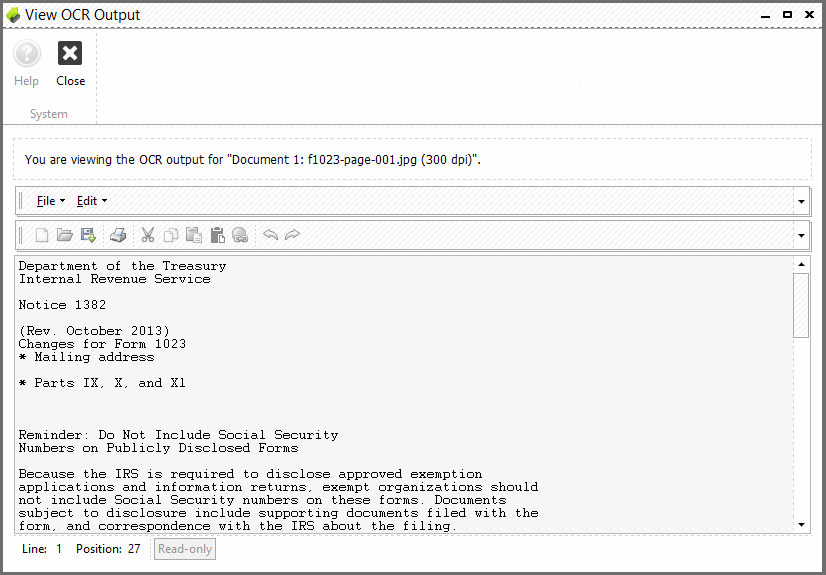
You can copy text from here or save it to text file or print if necessary. You can also look for some text on this page.
Usually there is no need to use a set of "Performance" buttons but sometimes they could be helpful.
"Disable OCR" button allows you to stop OCR process and compose a document without OCR-ing it. Once the document is composed you can enable OCR and the process will start immediately.
"Disable Refresh Upon OCR" button is helpful if you are reading a newly composed document. During OCR process your document will be refreshed as much times as much pages it contains. It will show you the first page upon each refresh and it makes impossible to read the document. This button disables refresh of the document upon OCR so you could familiarize with the document and enable refresh only when you're done with the document and the refresh will not distract you.
"Conserve CPU" button would be helpful for pretty old computers. By default OCR uses all cores of your CPU. Each core works on one page at a time. By clicking this button you will increase the time of OCR process but at the same time your CPU will be loaded less and your computer will be available for other CPU-dependent actions.
"Conserve Memory" button turns on a memory saving mode. The application keeps cached images on disk instead of placing them in the memory. It could be helpful if you have a low memory reserve or if you are working with big documents that can significantly increase memory usage. This mode turns on automatically if the document contains 25+ pages.