DocuSign integration can be turned on for each TaxWorkFlow user separately:
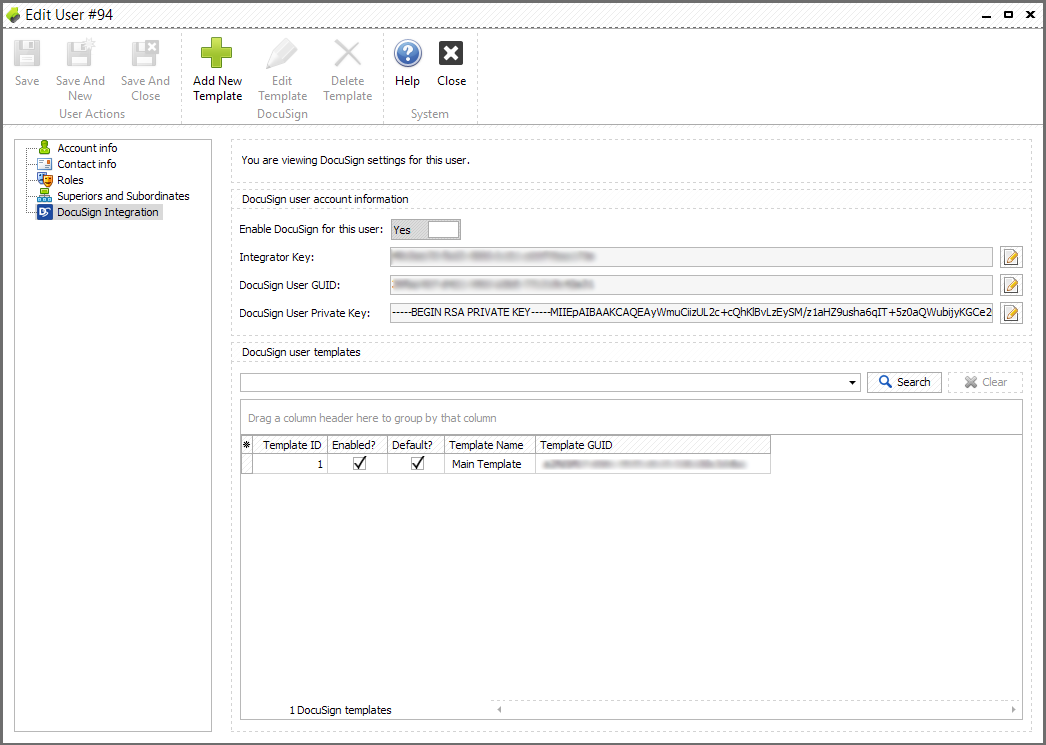
To setup DocuSign integration you need the following information:
•Integrator Key
•DocuSign User GUID
•DocuSign User Private Key
•DocuSign User Template GUID
Below you can find where this information can be found.
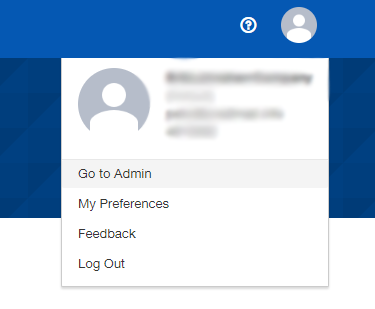
First login to your DocuSign account from any browser, click on your profile icon and select "Go to Admin":
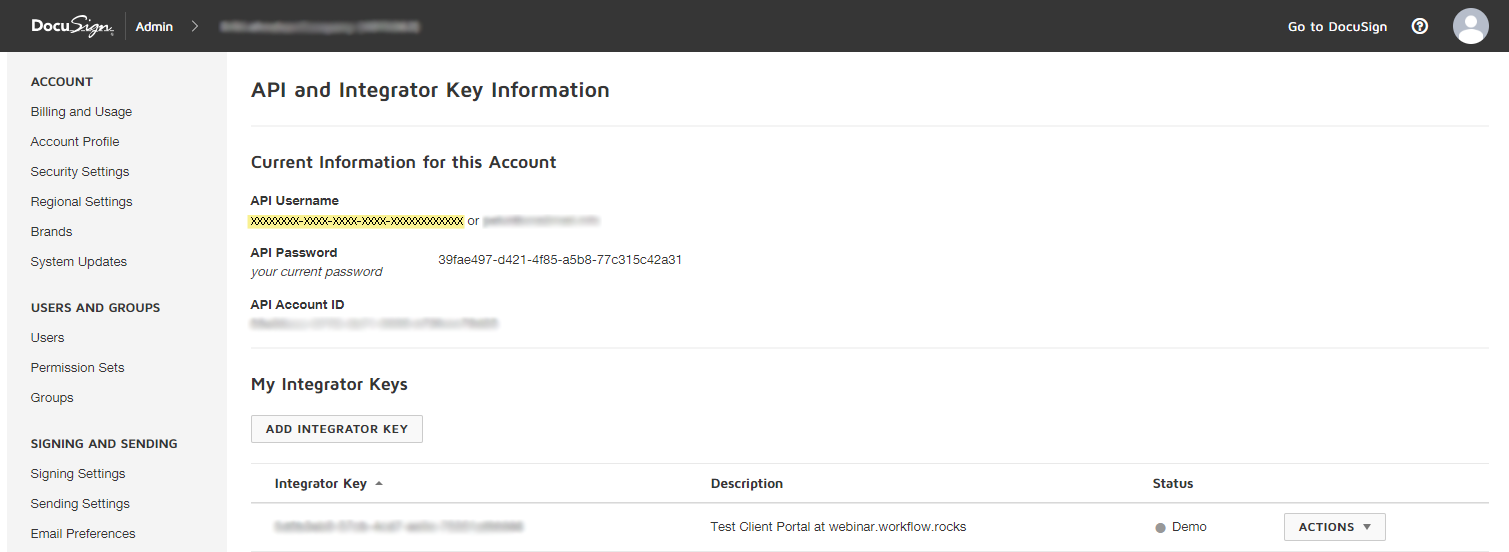
Next select "INTEGRATIONS >> API and Keys" from the sidebar menu.
Information under API Username highlighted in yellow is your DocuSign User GUID:
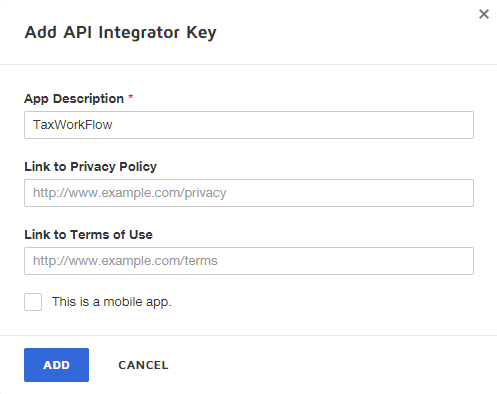
Next you can add API Integrator Key. Click "Add Integrator Key" button, enter app description, eg. "TaxWorkFlow" and click "Add":
Upon adding a new integrator key "Edit API Integrator Key" window will appear. Here you can find newly created Integrator Key. In case you already had an Integrator Key click on it to open "Edit API Integrator Key" window:
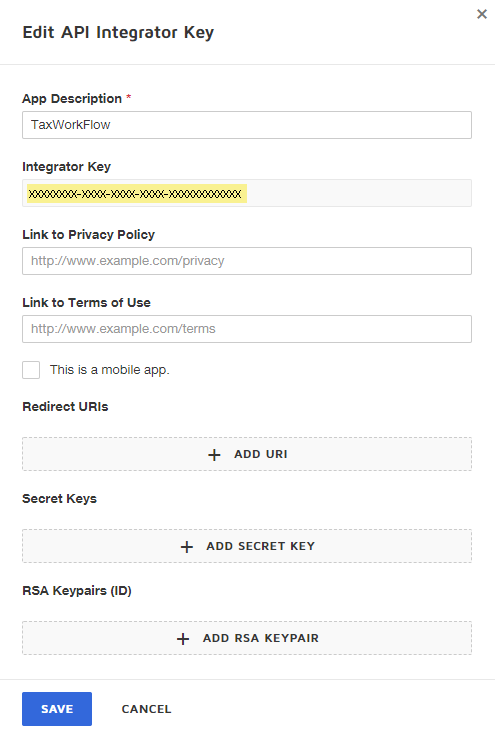
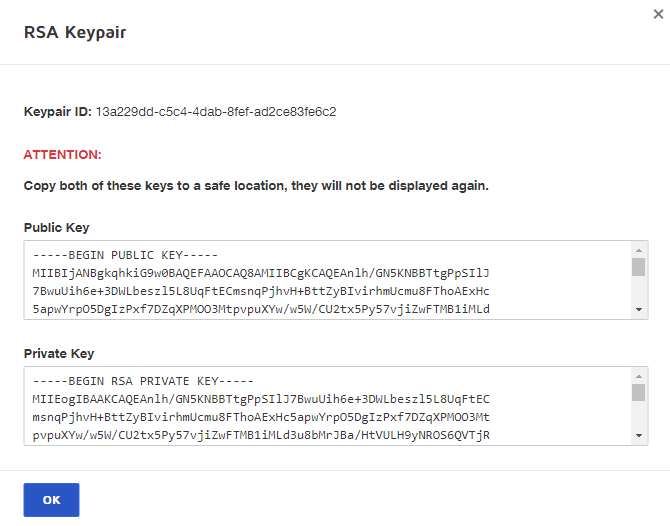
Click "Add RSA Keypair" button to generate public and private keys. Copy both keys to safe location and paste Private Key to TaxWorkFlow "DocuSign User Private Key" field:
Next you can add URI by clicking "Add URI" button. In our example URI is http://webinar.workflow.rocks/Documents/ProceedSignature but it will be different for your portal so please contact TaxWorkFlow support and/or your IT person in case you don't know URI.
The last step is to add DocuSign user template(s) to TaxWorkFlow. To add a template click "Add New Template" button. Here you need to name the template, enter a template GUID and decide if the template is default and enabled:
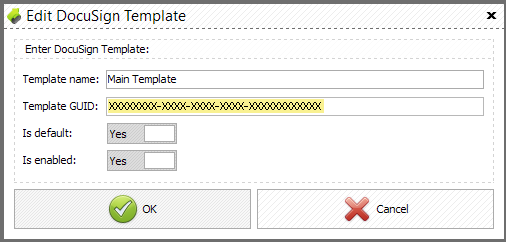
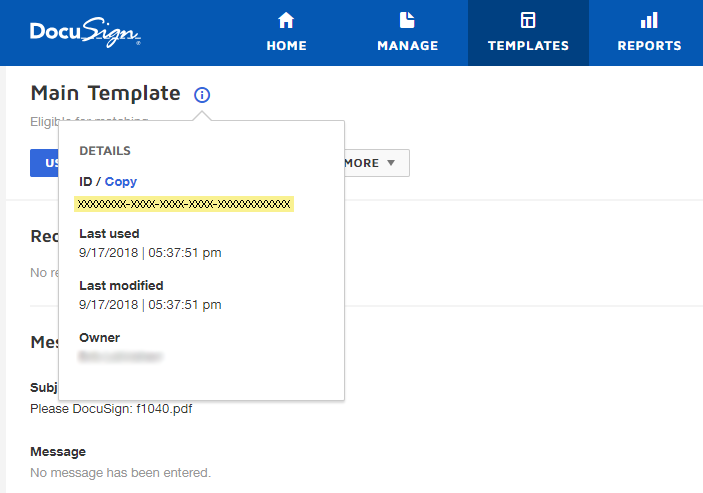
Template GUID can be found in your DocuSign account at "Templates" section:

Click on the template you would like to add to TaxWorkFlow, click information sign near template's name and click Copy above the Template's ID:
When your DocuSign account is set you are ready to use it on the portal. Here you can find a Go Live Guide from DocuSign: https://developers.docusign.com/esign-rest-api/guides/go-live