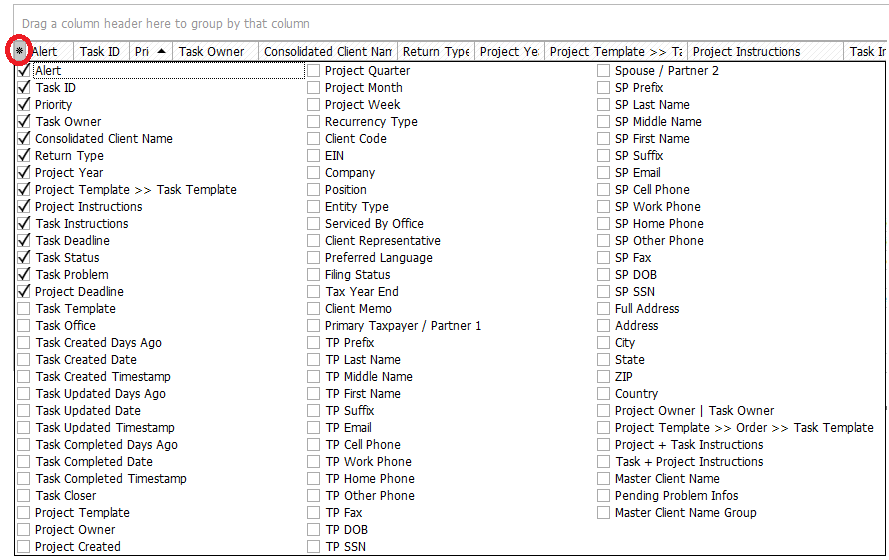
Tasks and projects grids contain many columns available to view. Usually not all of them are useful for user. To view all available columns click on the asterisk in the left top corner of the table:

Some of these columns consolidate information from other columns to make your work with the application easier. "Consolidated Client Name" field consolidates "Company" and "Primary Taxpayer" fields. "Project template >> task template" field consolidates project template and task template fields. Both fields are visible by default.
"Project Owner | Task Owner" field consolidates project owner and owner of the task if it's not the same person. "Primary Taxpayer / Partner 1" field consolidates clients first name and last name. "Spouse / Partner 2" field consolidates spouse's first name and last name. Another one field is "Full address" which consolidates client's address, city, state and zip. "Project + Task Instructions" and "Task + Project Instructions" fields consolidate instructions in certain order. All these fields are not displayed by default but you can easily make them visible by checking certain boxes.
If you work with tasks of some user or with your own tasks you can find a "Priority" column among other. If you can't see it add it as it was described above.

Here you can change the priority of tasks. Sort them by priority and than simply drag-n-drop the task according to its new priority.
Also, you can click "Reprioritize Tasks" button at the top of the tab and accept the reprioritization of tasks in the order they are displayed in your view.
Built-in filters allow you to change grid in several clicks according your needs. Most filters are understandable easily. Below is an explanation of how some of "Project Status" filters work:
•Next occurrence - this filter shows projects that has not occurred yet and will occur in future
•Last occurrence - this filter shows last projects that occurred (including stopped projects that will not reoccur again in future)
To save your grid to use it in future you can save it as a report. Read more about reports in "Reports Management" chapter.